Time Entry Options
Hour Timesheet 2.0 gives employees four flexible ways to enter time. All methods feed into the same weekly timesheet, so employees can choose the workflow that best fits their day.
The four available entry methods are:
- Calendar View
- List View
- Timesheet (Grid) View
- Timer View
Each method is explained below with step‑by‑step instructions and screenshots.
Option 1: Calendar View — Visual, Day‑by‑Day Entry
The Calendar View displays your hours in a familiar calendar layout. Each day shows the hours worked, charge code, and project details.
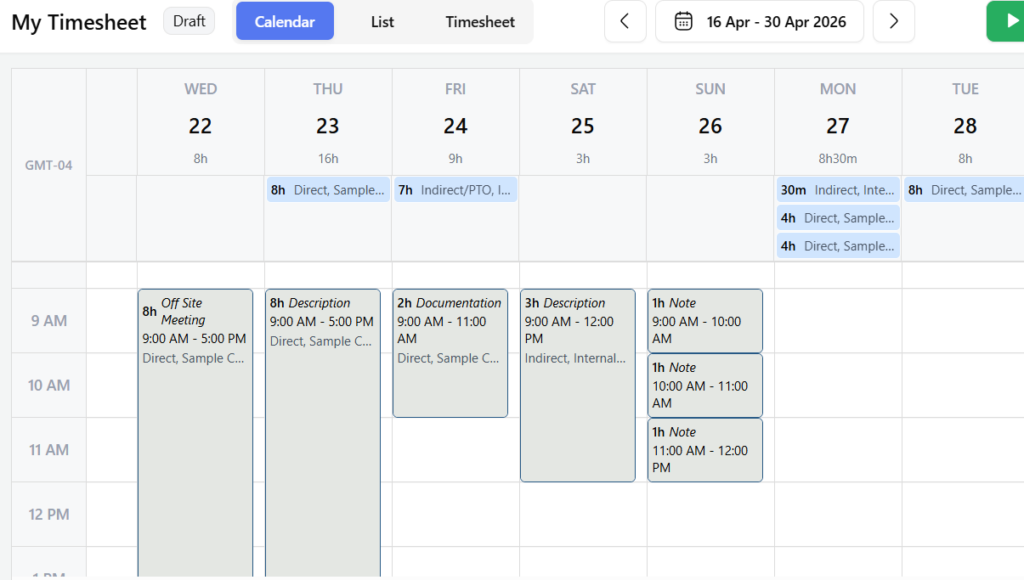
How to Enter Time in Calendar View
Step 1: Go to My Dashboard → Timesheet → Calendar.
Step 2: Confirm the correct date range at the top.
Step 3: Click the day you want to enter time for.
Step 4: Enter the required details:
- Hours or start/end time
- Service Item / Charge Code
- Customer/Job (if applicable)
- Notes or description
Step 5: Click Save.
Step 6: Repeat for other days, then click Submit when the period is complete.
Option 2: List View — Fast, Scrollable Entry
The List View organizes all entries in a clean, scrollable list grouped by week. This view is ideal for quick review and rapid edits.
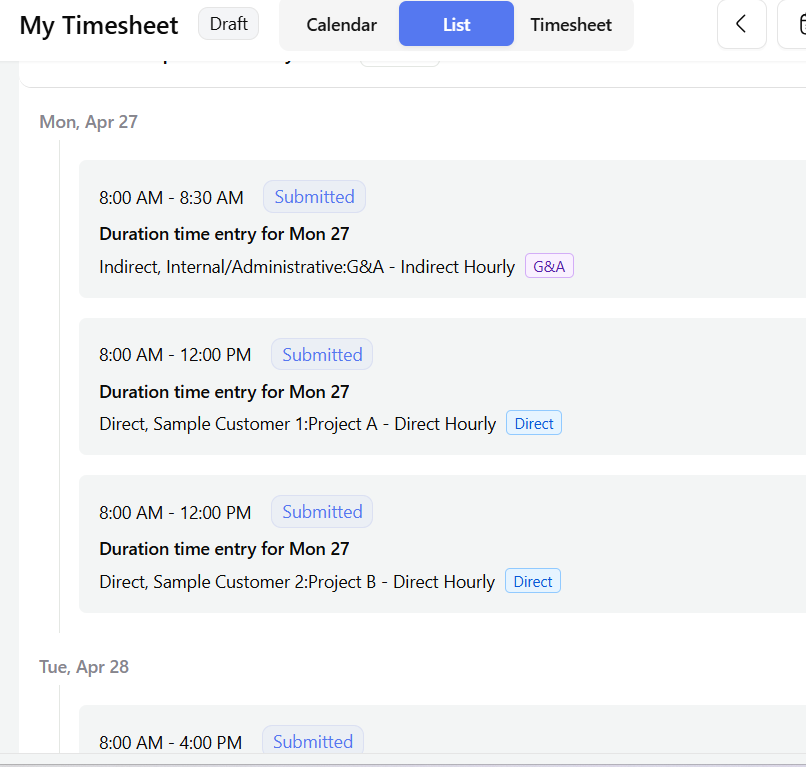
How to Enter Time in List View
Step 1: Go to My Work → Timesheet → List.
Step 2: Confirm the date range.
Step 3: Click + Add Work Hours.
Step 4: Enter:
- Date
- Start/End time or Duration
- Service Item / Charge Code
- Customer/Job
- Notes
Step 5: Click Save.
Step 6: To edit an entry, click the entry or its Action menu.
Step 7: When all entries are complete, click Submit.
Option 3: Timesheet View — Traditional Weekly Grid
The Timesheet View displays hours in a weekly grid, similar to a spreadsheet. Each row represents a project or charge code, and each column represents a day.
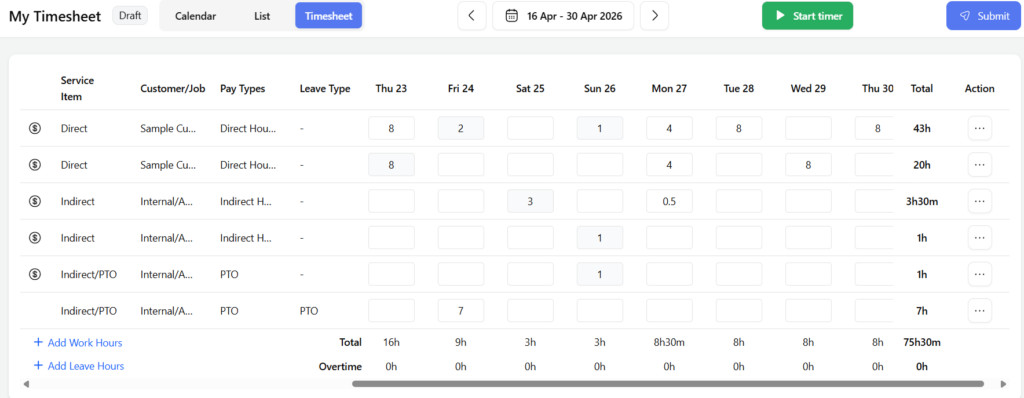
How to Enter Time in Timesheet View
Step 1: Go to My Dashboard→ Timesheet → Timesheet.
Step 2: Confirm the date range.
Step 3: Click + Add Work Hours to add a new row.
Step 4: Select:
- Service Item / Pay Type
- Customer/Job
Step 5: Enter hours directly into the grid for each day.
Step 6: For leave, click + Add Leave Hours and complete the row.
Step 7: Review daily and weekly totals.
Step 8: Click Submit when finished.
Option 4: Timer View — Real‑Time Tracking
The Timer View allows employees to track work as it happens. Start the timer when you begin a task and stop it when you finish — the system creates the entry automatically.

How to Enter Time Using the Timer
Step 1: Click Start timer from any timesheet view.
Step 2: Enter:
- Description
- Charge Code / Service Item
- Customer/Job
- Billable (if applicable)
Step 3: Click Start timer now.
Step 4: Work normally; return to stop the timer when done.
Step 5: Review the auto‑created entry and adjust if needed.
Step 6: Save the entry.
Step 7: Submit your timesheet when the period is complete.