Watch Video
Timesheet Sections
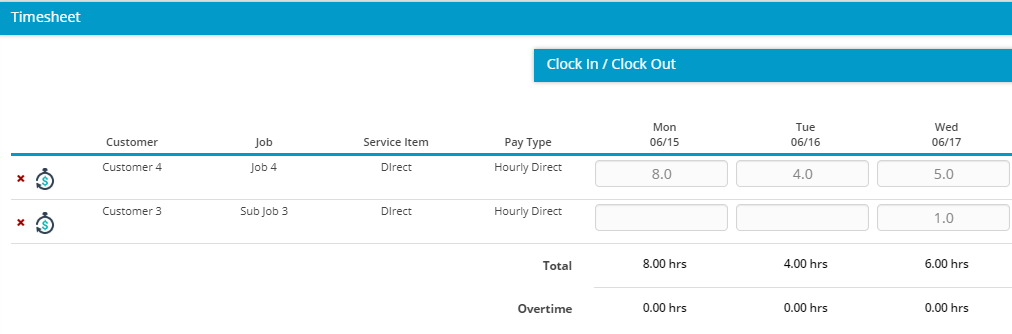
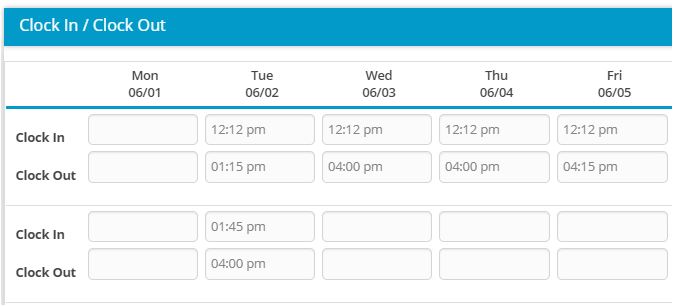
Section 1. Clock In/Clock Out (optional)
1. Employees can click the Clock In (or out) from the login page or the mobile app. Upon clocking in, the user will be prompted to choose from a list of charge codes. At the time of “Clock Out” the difference between the Clock-in and Clock-out time will be entered on the timesheet (hours worked section) next to the charge code selected at the clock in function.
This feature is optional and is hidden by default if no values are present in the in/out section of the timesheet.
Section 2. Work Hours and Leave Hours
This section is required for QuickBooks timesheet integration.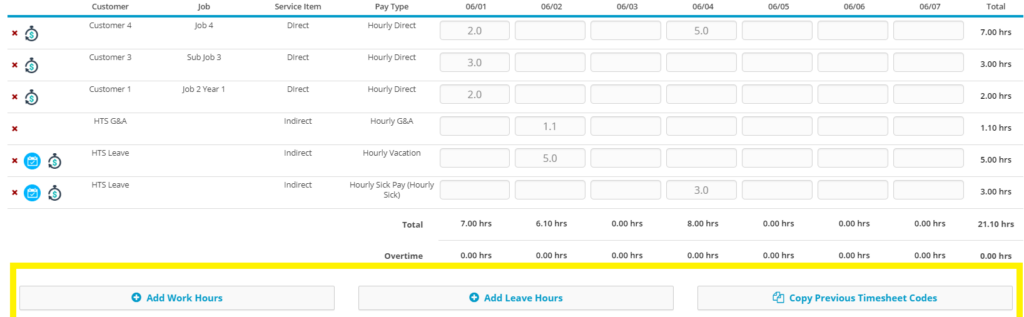
Adding Work Hours – this section contains a set of drop down boxes that are available once the user clicks the “Add Work Hours” button on the timesheet. These codes are referred to as “Employee Authorized Charges”. These selections are designed limited to codes each user is “authorized” to use when charging time on the timesheet.
- Click the Add Work Hours button
- Select the appropriate Charge Code
- Click Save
- Enter Hours to appropriate date/day on timesheet
- Click the tab button on your keypad or move out of the cell to save the entry.
Adding Leave Hours – this section contains a set of drop down boxes that are available once the user clicks the “Add Leave Hours” button on the timesheet. These codes are the leave types that are available to each user of Hour Timesheet.
- Click the Add Leave Hours button
- Select the appropriate Leave Code
- Enter Hours to appropriate date/day on timesheet
Copy Previous Timesheet Codes – this feature allows the user to copy the codes from the previous timesheet
period to the current period.
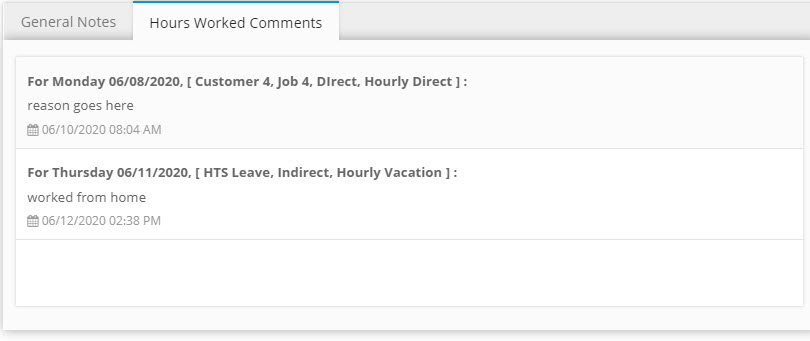
Section 3. Timesheet Comments/Leave Balance
Section for entering daily hours worked notes or viewing leave balance data or timesheet summary overview.
Section 4. Timesheet Audit Log
This section of the timesheet is auto populated with each entry into the employee timesheet. The audit trail captures the username of the person who made the timesheet entry, the IP address of the person who made the entry along with a time and date stamp of the entry made. The audit trail is not editable.

Timesheet Leave Balance
- Navigate to My Timesheet menu
- Click the Leave Balance tab
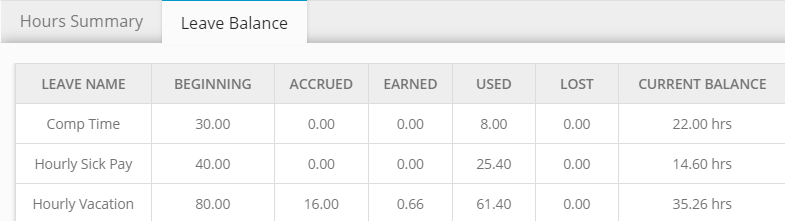
Additional notes
Balance is reduced after timesheet is submitted at the end of each timesheet period.
User receives error message upon entering time that exceeds current balance.
User may be allowed to “go into the negative” if feature is configured.
System will stop accruing leave once limit “ceiling” is reached. Additional leave earned or accrued after leave ceiling is reached is moved to the “lost” column.
System will reset balance to “carry-over” value each year
Timesheet Archives
- Navigate to My Timesheet menu
- Click the Calendar icon
- Select the Date of the timesheet wanting to view.
Timesheet Web Clock

- Navigate to the Hour Timesheet login page
- Enter username and password
- Click the “Clock In” button to capture the current “In” time on the timesheet
Timesheet Submittal
- Click Submit button
- Click Submit again in the popup box
Watch video clips below
Watch Video – Completing a timesheet→Entering hours worked without in_out times [Video Clip]
→Entering hours worked with in_out times [Video Clip]