Manage Data from QuickBooks
NOTE: All data in HTS originates in your company QuickBooks file. HTS does not allow the following to be entered from your HTS account.
- Customers, Jobs and Projects
- Service Items
- Classes
- Payroll Items
HTS uses an online sync function to import data from your company QuickBooks Online account to your HTS account. To add any of the items above into your HTS account, follow the steps below.
Step 1. Sync (Import) New Data From QuickBooks
- Open your QuickBooks Online company file
- Enter the new data (customer/job, service item or class)
- Login to your HTS account as an Admin
- Navigate to the Settings/Connect to QuickBooks page
- Click the Import button

Step 2. Mapping Codes In Hour Timesheet
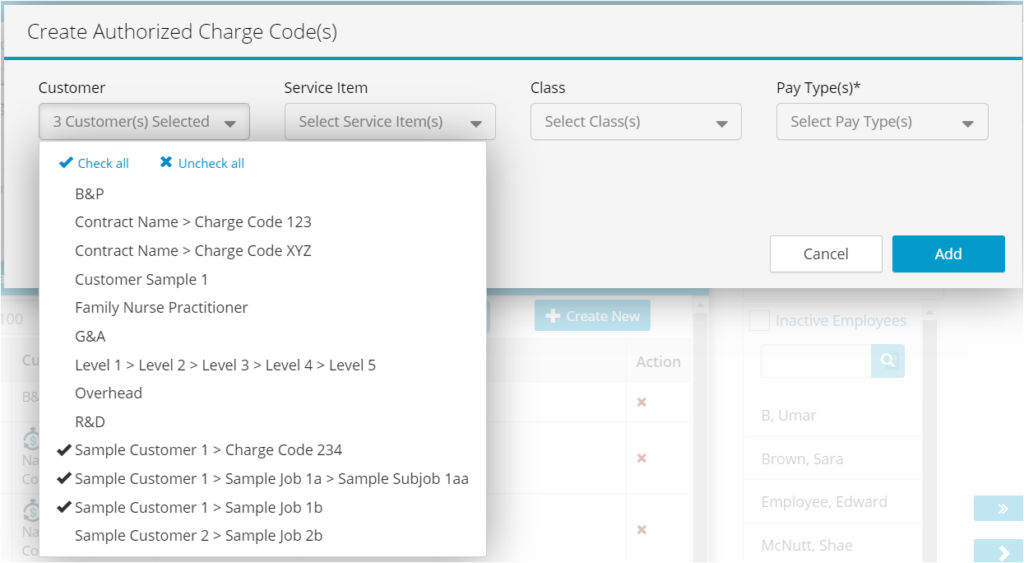
Upon a successful connection, your new data is now in HTS. To see the new codes in HTS, navigate to the Accounting/Codes page
- Click Create New to map the new code
- Select the required items from the Customer/Job(s) list needed for association to employee(s) REQUIRED
- Select the required items from the Service Items list needed for association to employee(s) OPTIONAL
- Select the required items from the Classes list needed for association to employee(s) OPTIONAL
- Select the required items from the Payroll Item list needed for association to employee(s) [QuickBooks Desktop ONLY]
- Click the Add button
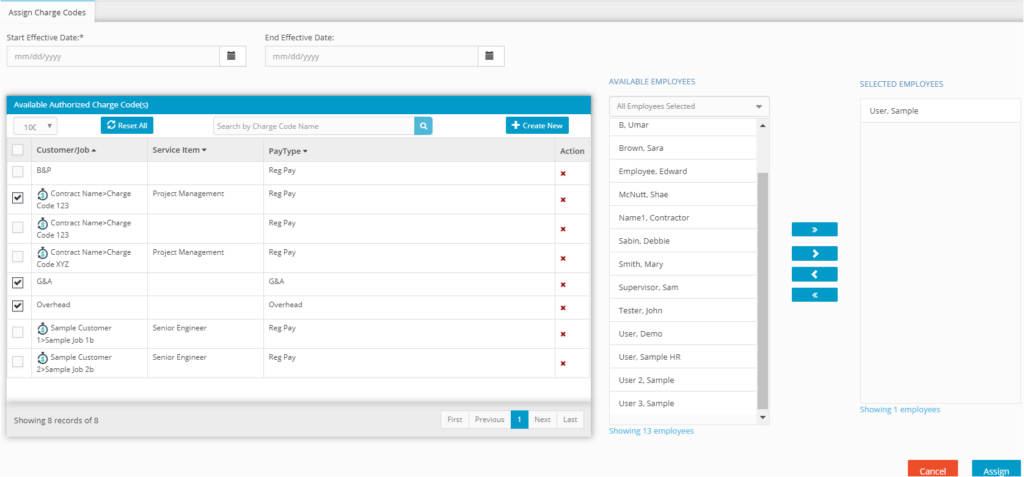
Step 3. Assign Employee Charge Codes
Creating charge code associations for each employee will limit what the user is able to charge to when entering hours on a timesheet. Employees can have multiple charge code associations and charge codes can be assigned to multiple employees. To create charge code associations, follow the steps below:
- Navigate to the Accounting/Codes menu
- Place a check in the Available Authorized Charge Code(s) – created in previous setup process.
- Select from the Available Employees list the appropriate employees to be associated to the Available Authorized Charge Code(s) from above.
- Click the > to move the selected employees from #8 above to the selected employee list box
- Click the calendar icon box to select a Start Effective Date and End Effective Date (optional)
- Click the Assign button to complete.