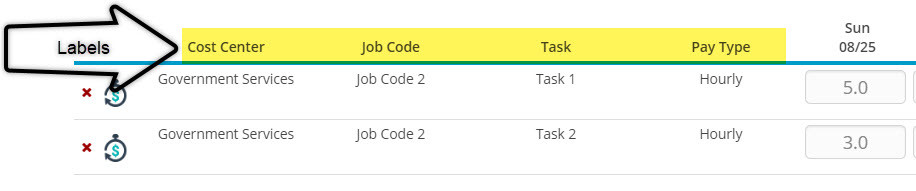
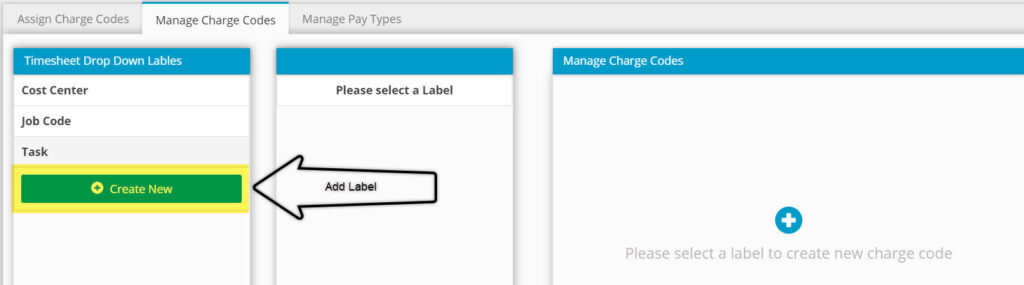
Step 1. Creating Timesheet Drop Down Labels
Labels are also known as timesheet headings. You are able to define your own labels to be displayed on the drop-down box selection on the employee timesheet.
Follow the steps below to create Timesheet Labels
- Login to HTS as an admin
- Navigate to the Accounting/Codes/Manage Codes Page
- Click Add New
- Enter Label content
- Click Add
- Repeat steps 1-5 for each label you will need to create for timesheet entry
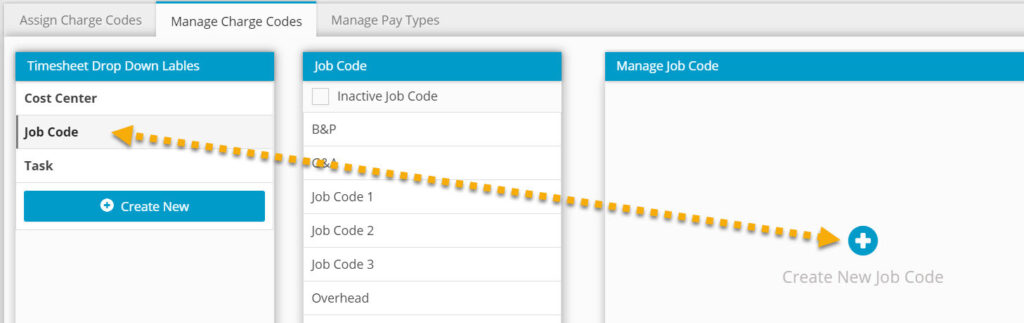
Step 2. Adding Charge Codes
Once timesheet headings are created, you are now able to create charge codes. These charge codes are the items that employees will be charging time against when completing a timesheet.

Follow the steps below to create Charge Codes
- Login to HTS as an admin
- Navigate to the Accounting/Codes/Manage Codes Page
- Click the label you are wanting to add codes to (example…we will be adding job codes)
- Under Manage Job Code (right side) click the Create New Job Code (this will be the list of labels created above)
- Enter Job Code data and hit Save
- As you add new Job Codes, you will see the list populate in the middle box on the page
- Repeat steps 1-6 above for each of your timesheet labels that you will be tracking time against on the timesheet.
Step 3. Adding Pay Types
You are now ready to create pay types. Hour Timesheet automatically categorizes pay types into 3 categories
- Regular (examples…Hourly, Salary, G&A, Overhead, B&P)
- Overtime (examples….Standard OT, unpaid OT, Double OT
- Leave (examples….sick, vacation, PTO, Military, Holiday)
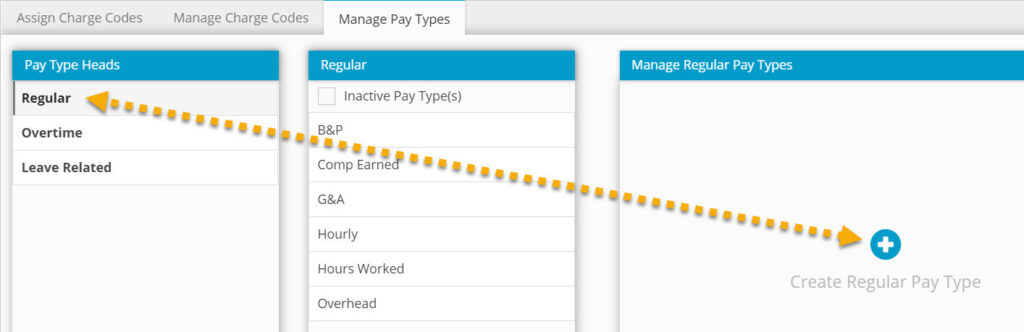
Follow the steps below to create Pay Types
- Login to HTS as an admin
- Navigate to the Accounting/Codes/Manage Pay Types
- Click the Pat Type Head (Regular, OT or Leave) you are wanting to add a pay type to
- Under Manage Regular Pay Types (right side) click the Create New Regular Pay Type
- Enter Pay Type data and hit Save
- Repeat steps 1-5 above for each of your Pay Type that you will be tracking time against on the timesheet.
Step 4. Charge Code Mapping
Once your data has been added, you will need to setup the mapping. This process maps each of the above items to each other so that codes can be assigned to your employees.
- Navigate to the Accounting/Codes page
- Click Create New to map the new code
- Select the required items from the [insert column heading 1 here] list needed for association to employee(s) REQUIRED
- Select the required items from the [insert column heading 2 here] list needed for association to employee(s) if required
- Select the required items from the [insert column heading 3 here] list needed for association to employee(s) if required
- Select the required items from the Payroll Item list needed for association to employee(s)
- Click the Add button
- Repeat steps 1-7 until all charge code data has been mapped and is displayed correctly in the Available Authorized Charge Code(s) box on the Accounting/Codes page.

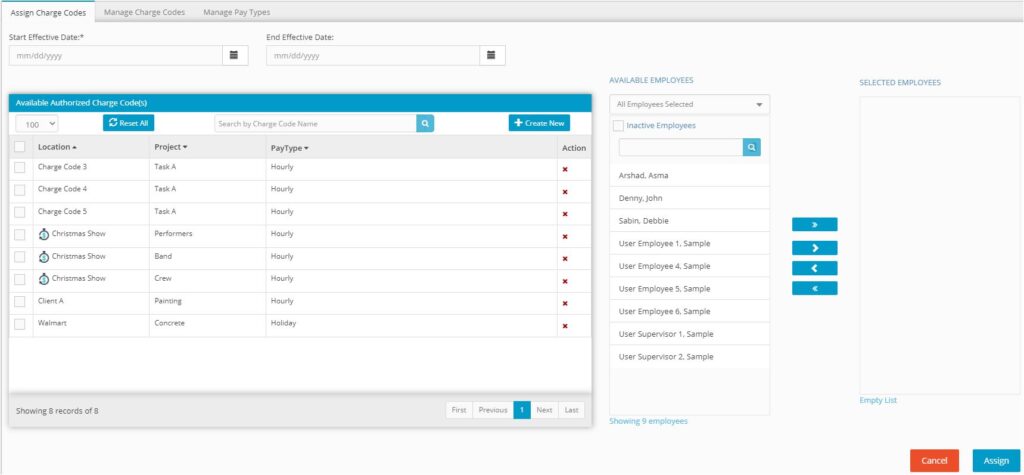
Step 5. Assign Employee Charge Codes
Creating charge code associations for each employee will limit what the user is able to charge to when entering hours on a timesheet. Employees can have multiple charge code associations and charge codes can be assigned to multiple employees. To create charge code associations, follow the steps below:
- Navigate to the Accounting/Codes menu
- Place a check in the Available Authorized Charge Code(s) – created in previous setup process.
- Select from the Available Employees list the appropriate employees to be associated to the Available Authorized Charge Code(s) from above.
- Click the > to move the selected employees from #8 above to the selected employee list box
- Click the calendar icon box to select a Start Effective Date and End Effective Date (optional)
- Click the Assign button to complete.