Syncing, Mapping, and Assigning Employee Charge Codes in Hour Timesheet
Hour Timesheet (HTS) uses a three‑step workflow to bring in your accounting data, map it into usable charge codes, and assign those codes to employees. This ensures employees only see the projects, tasks, and labor categories that apply to them when entering time.
Step 1: Sync Your Accounting Data
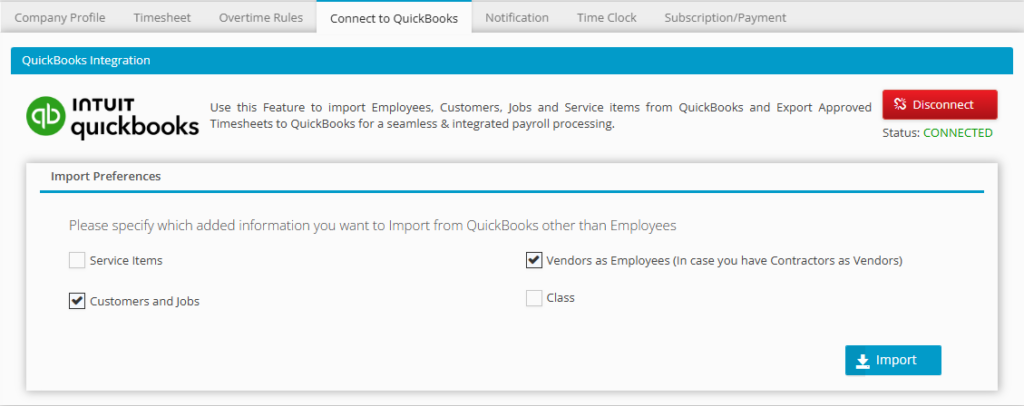
How to Sync (Import) Data From QuickBooks Online
- Click Import to begin the sync.
- Log in to your Hour Timesheet account as an Admin or Accountant.
- Navigate to Settings → Connect to QuickBooks.
- Check the boxes next to the data types you want to import.
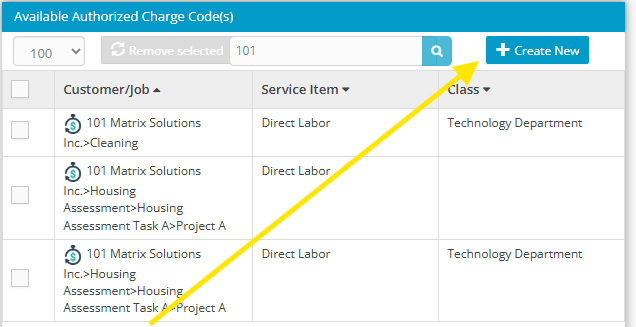
Step 2: Map Codes in Hour Timesheet
Mapping creates the actual Authorized Charge Codes that employees will use on their timesheets. Each mapped code represents a combination of accounting elements (Customer/Job, Service Item, Class, Payroll Item).
To Map New Charge Codes:
- Go to Accounting > Codes.
- Click Create New.
- Select the required items from each list:
- Customer/Job(s) – Required
- Service Items – Optional
- Classes – Optional
- Payroll Item – QuickBooks Desktop only
- Click Add to create the mapped code.
Your newly mapped code will now appear in the Available Authorized Charge Codes list and can be assigned to employees
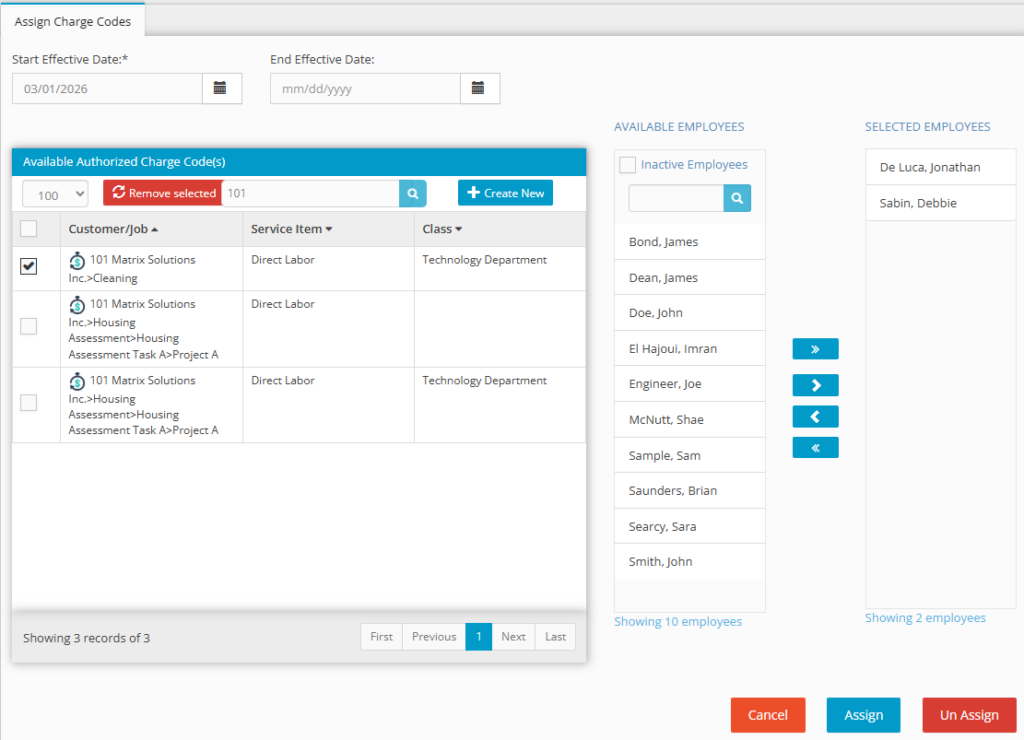
Step 3: Assign Employee Charge Codes
Assigning charge codes controls what employees see on their timesheet.
- If no assignments are made, employees will see all available codes.
- If assignments are made, employees will see only the codes assigned to them.
To Assign Charge Codes to Employees:
- Navigate to Accounting > Codes > Manage Charge Codes.
- Select the Assign Charge Codes tab.
- Check the box next to the Available Authorized Charge Code(s) you want to assign.
- From the Available Employees list, select the employees who should have access to those codes.
- Click the > button to move them into Selected Employees.
- (Optional) Set a Start Effective Date and End Effective Date if the assignment should be time‑bound.
- Click Assign to complete the setup.
- Employees will now see only the charge codes assigned to them within the effective date range.