Have a Question?
Step 1. Setting Up Leave Types
Leave Types are the foundation of leave management in Hour Timesheet. They represent the specific categories of time off your employees can request and track — such as Sick Leave, Vacation, Personal Time, or Jury Duty. Before employees can log time off on their timesheets, an Admin or Accountant must set up the appropriate Leave Types in the system. This is Step 1 of a 3-step setup process.
How to Set Up Leave Types
Before you begin, make sure you are logged in as an Admin or Accountant. Leave Types are linked to payroll items or service items from QuickBooks, or entered manually in a Stand-alone HTS account — so have those items ready before starting.
Steps
- Log in to Hour Timesheet as an Admin or Accountant.
- Navigate to Accounting → Leave in the left menu.
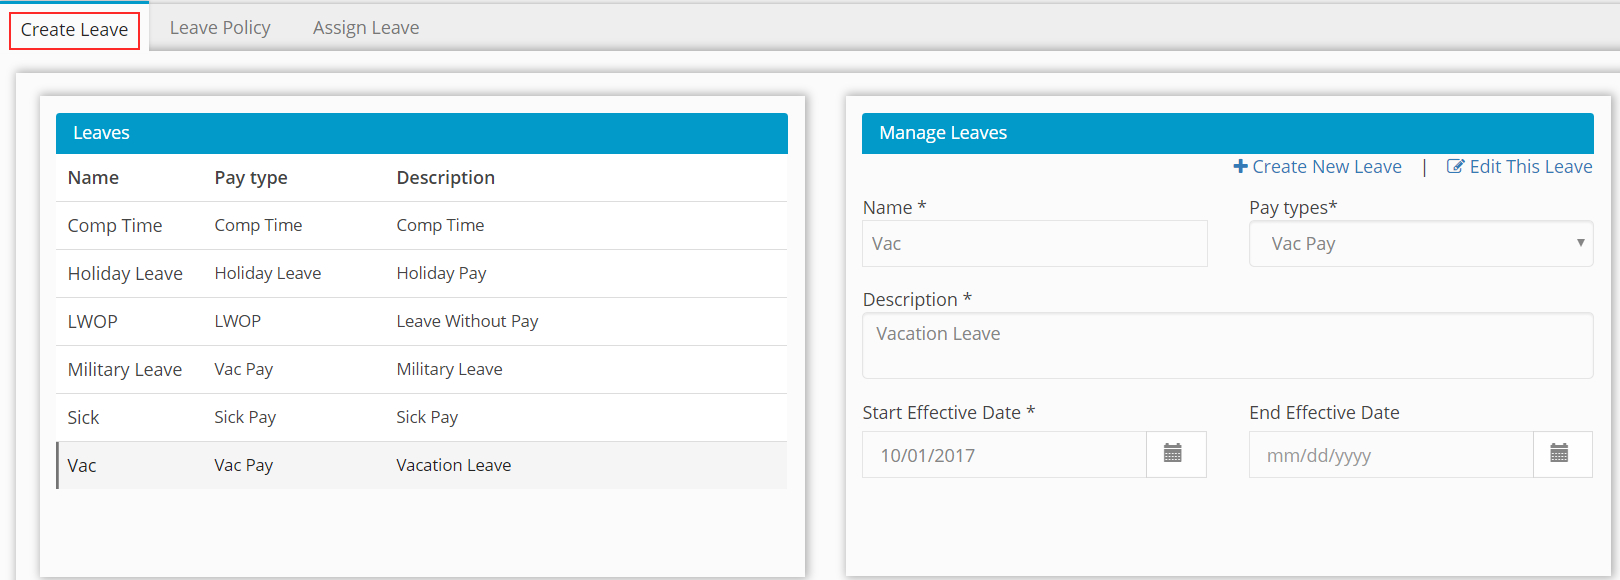
- Click Create New Leave.
- Enter a Leave Name — for example: Sick Leave Pay
- Select a Pay Type or Service Item from the dropdown — for example: Sick Leave
- Enter a Description — for example: Sick Leave Pay
- Enter a Start Effective Date — for example: 01/01/2024
- Click Save to complete the entry.
- Repeat steps 3–8 for each additional leave type you need to create.