Signing Up
Fill out the Sign Up form on our home page . Once the form is complete, a setup wizard will walk you through the Hour Timesheet setup process. The form requires the following information:
First Name, Last Name
Email Address (this will be your primary admin user login)
Password
Company Name
And your done! You now have your own Hour Timesheet URL
Setup Wizard
The wizard will direct you to the first step in the process. Don’t worry if you don’t have time to complete the setup now, you can come back to it at any time. You will also receive a confirmation email containing the URL and login information. Save this email for a later date in case you don’t remember your Hour Timesheet site URL.

Configuration Wizard – Step 1 Timesheet Settings
Timesheet Type – This is the timesheet period. Your options are weekly, biweekly, semi-monthly and monthly. Start Day of the Week – This is the day of the week that you would like your timesheet to begin on (Sunday, Monday, Tuesday, etc). Start Time – This is the start time of the day. The default time is set to 12am. Capture reason for any changes made in previous days time (check box) – When this box is checked, users will be prompted to insert a reason for editing a prior days timesheet or failing to enter time on the current day. NOTE: This box should be checked for DCAA compliance.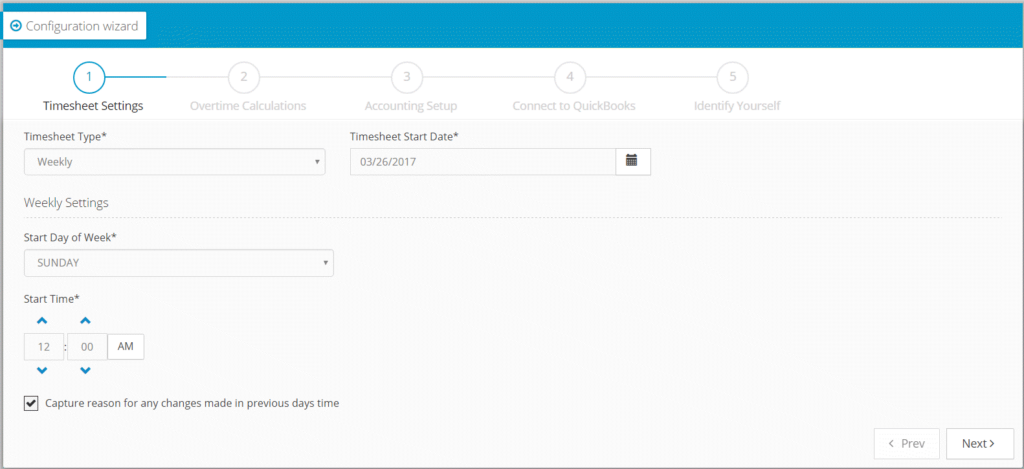
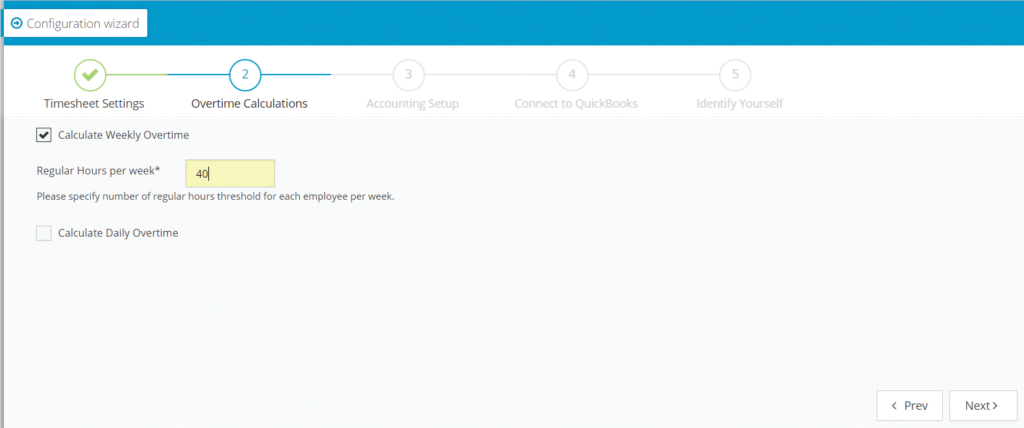
Configuration Wizard – Step 2 Overtime Calculations
Calculate Weekly Overtime (check box)
Regular Hours per week* – This box should be checked for organizations who pay hourly employees. All hours exceeding the value entered in this box will automatically be classified as overtime.
Calculate Daily Overtime (check box)
Regular Hours per day* – This box is typically checked for organizations in California who are required to pay employees based on hours per day and not hours per week.
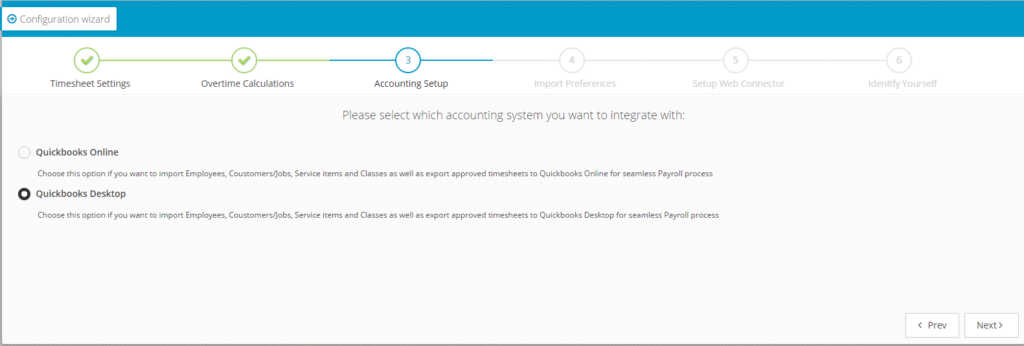
Configuration Wizard – Step 3 Accounting Setup (QuickBooks Desktop)
Hour Timesheet will sync (import and export) data with your QuickBooks Desktop account using the QuickBooks Web Connector . To sync your data, you will need access to your login credentials for your QuickBooks Desktop account.
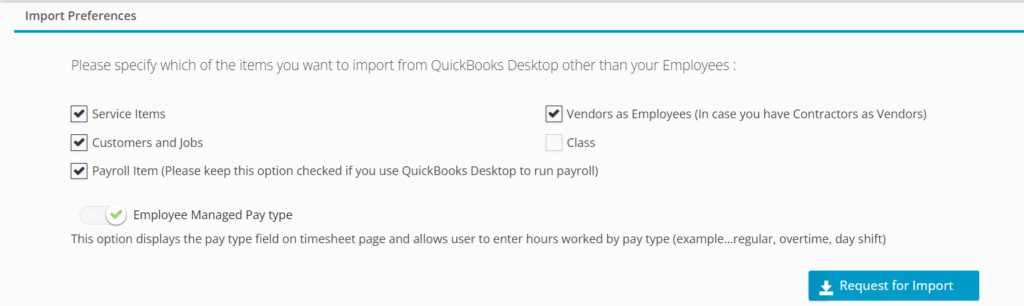
Configuration Wizard – Step 4 Import Preferences (QuickBooks Desktop)
You are now ready to select which data elements you will need to collect timesheet data against. Hour Timesheet will import Employee data by default (no check box required). You also have the ability to import Customer/Jobs, Payroll Items, Service Items, Classes and Vendors. Place a check in the box next to the data that you would like imported from your QuickBooks Desktop company file.
Configuration Wizard – Step 5 Setup Web Connector (QuickBooks Desktop)

The QuickBooks Web Connector is a software application that runs on Microsoft Windows that enables Hour Timesheet to exchange data with QuickBooks Desktop.
Download the Hour Timesheet QuickBooks Web Connector Installer File. (link provided in wizard). For detailed installer instructions, click the knowledge base link below.
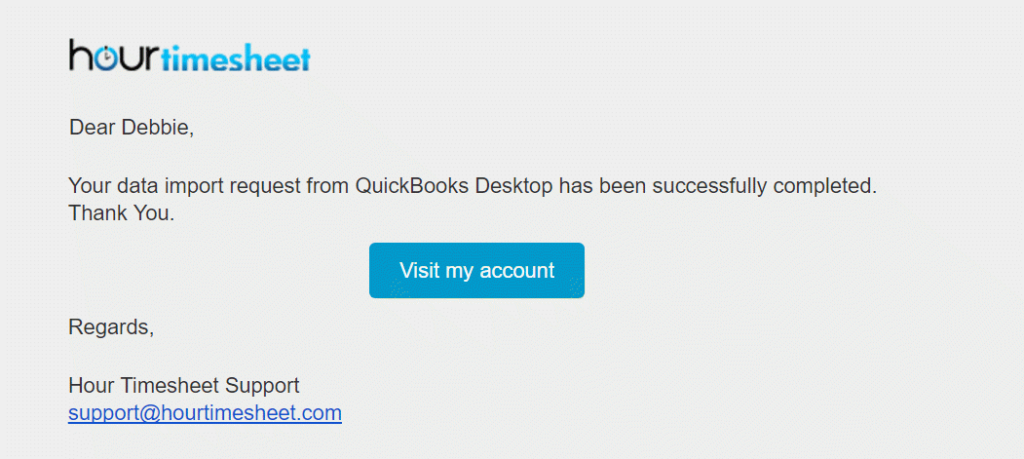
Web Connector Installer Instructions Upon successful completion, the Hour Timesheet Setup Wizard will change the connection status on the screen to Connected and the Next button will be active (you can click it).Note: Once the import process is complete from QuickBooks Desktop a confirmation e-mail will be sent to you.
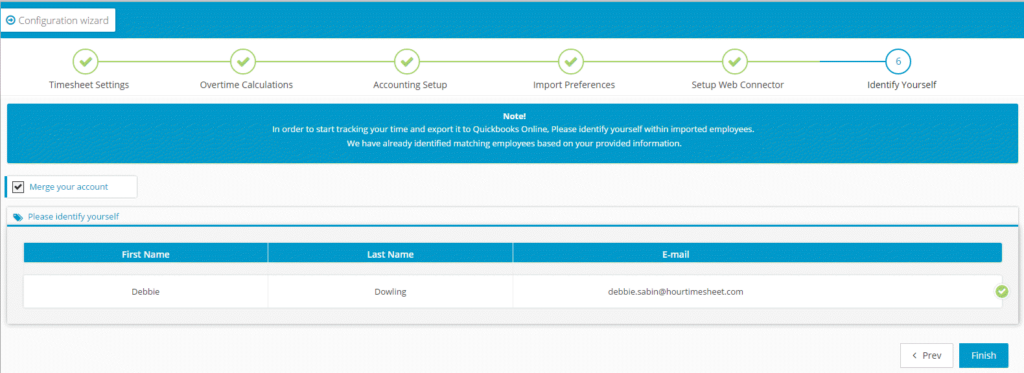
Configuration Wizard – Step 6 Identify Yourself (QuickBooks Online)
By default, you will only be given the Admin role. If you are also an end user and need to complete a timesheet, select your name in the box below. This process will give your username the employee role.
Next Steps
Creating Groups (optional)
Assigning Supervisors to Groups
Back to Knowledge Base Main