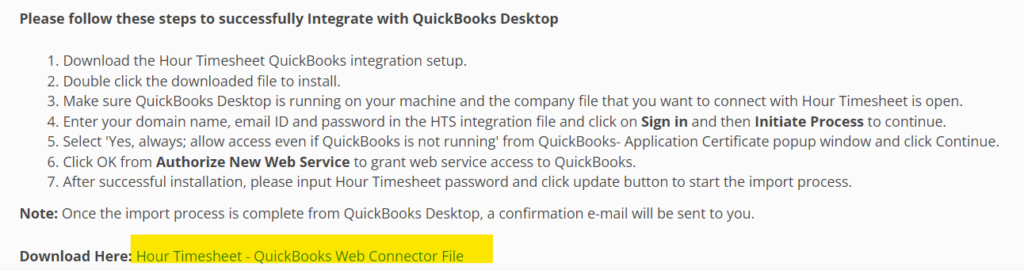
Simple Timesheet Setup for QuickBooks Desktop Integration
The Web Connector is a built-in add on service that works with the following versions of Intuit and QuickBooks Desktop versions:
QuickBooks Enterprise Solutions (2015 or later)
QuickBooks Premier (2015 or later)
QuickBooks Pro (2015 or later)
If you have other applications exchanging data with your QuickBooks Desktop, you will already have a version of the connector downloaded. Use the link below provided in the setup wizard to connect your Hour Timesheet site to the Web Connector. Follow these steps to successfully download and integrate Hour Timesheet with your QuickBooks Desktop company file.
Before you begin. Make sure QuickBooks Desktop is running on your machine and the company file that you want to connect with Hour Timesheet is open. Follow the instructions below for QuickBooks Desktop Integration (setting up the web connector)
Screen 1 – Click
Download Here to begin with execution of the Hour Timesheet QuickBooks integration setup Wizard. Once download is complete, Run or Open the downloaded file from your browser.
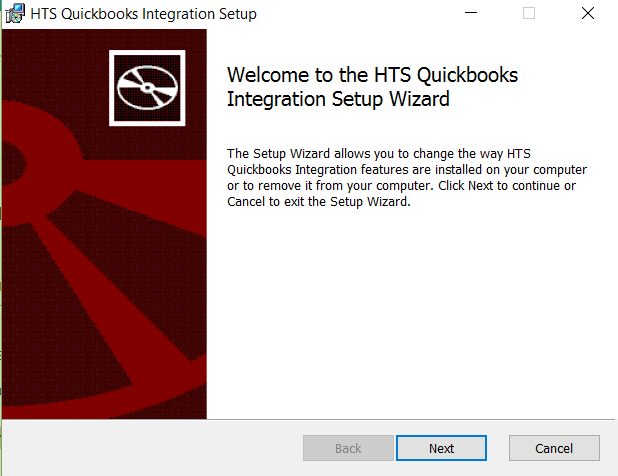
Screen 2 – Click
Next to continue with execution of the HTS QuickBooks Integration Setup Wizard
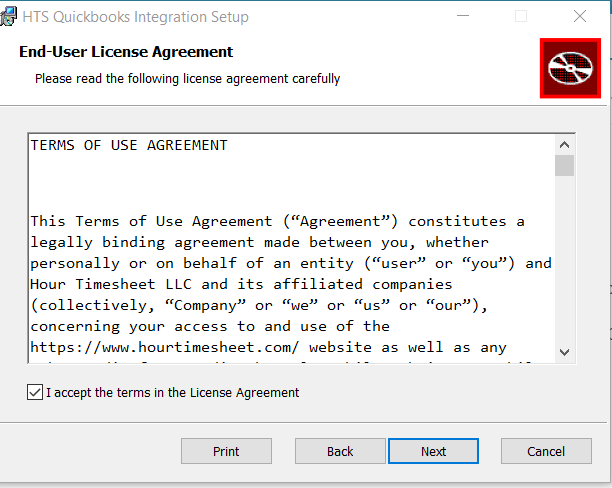
Screen 3 – Terms of Use Agreement. Place a check in the box “
I accept the terms in the License Agreement box and click
Next
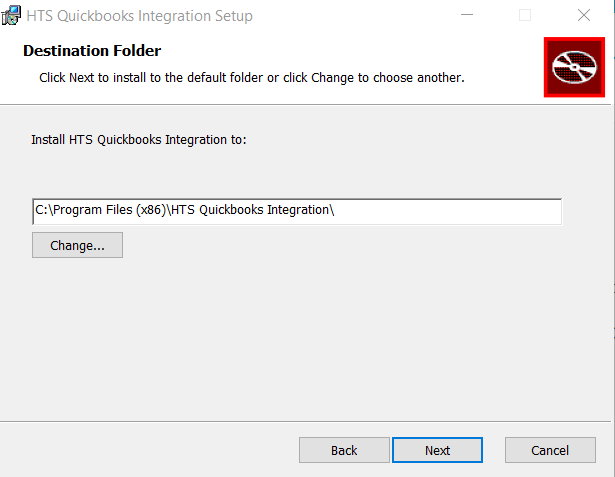
Screen 4 – Click
Next to download the file to the location provided in the path. This location can be changed if required.
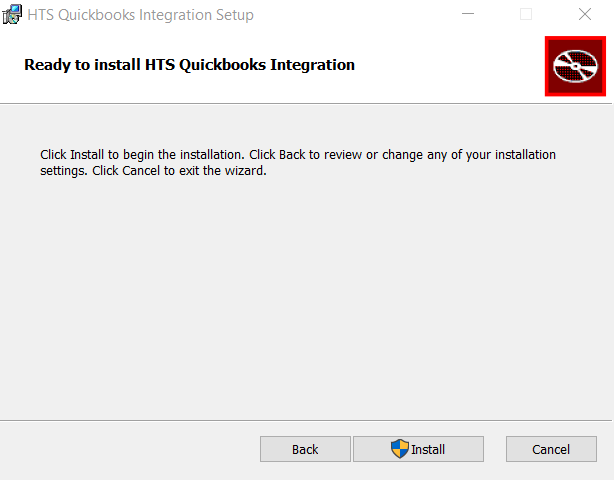
Screen 5 – Click
Install to begin the installation process.
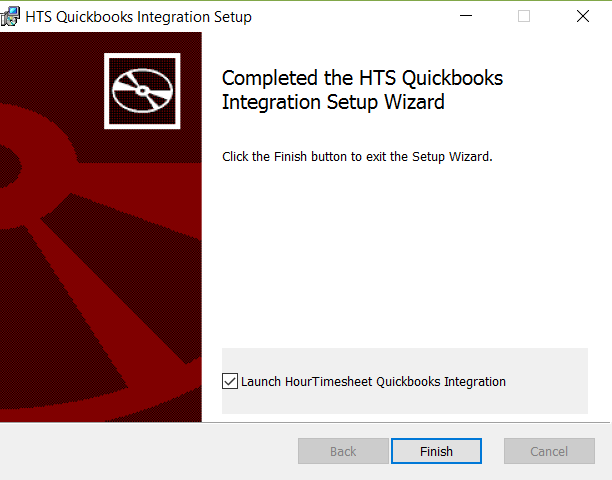
Screen 6 – Click
Finish to complete and exit the wizard.
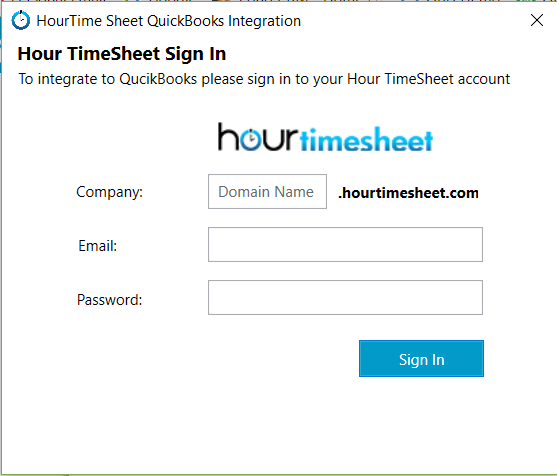
Screen 7 – You will now be prompted to enter the information captured during the completion of the Hour Timesheet Sign Up form. Enter the domain (URL) along with the email address and password created in the 1st step of this process. Click
Sign In then ‘
Initiate Process’ to continue.
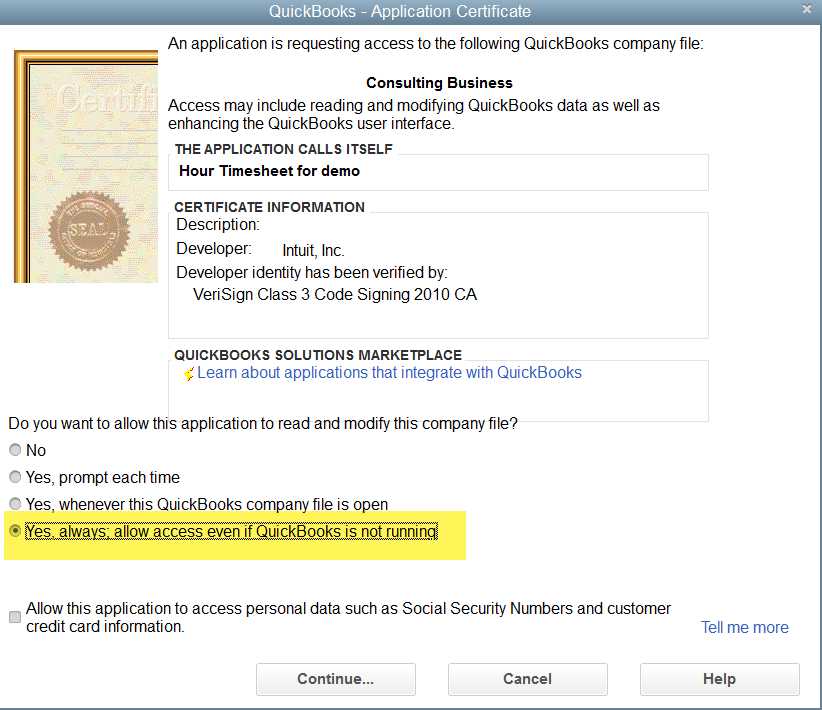
Screen 8 – You will now be prompted to allow Hour Timesheet to read and modify your company file Make sure you change the default setting to the last option of radio buttons from the screenshot below select
Yes, always; allow access even if QuickBooks is not running (last option) from QuickBooks- Application Certificate popup window and click
Continue.
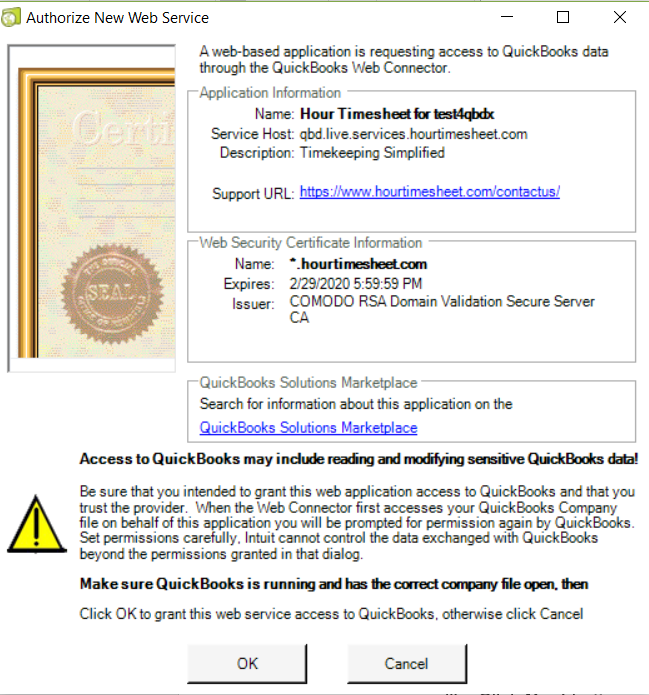
Screen 9 – Click
OK from ‘Authorize New Web Service’ to grant web service access to QuickBooks
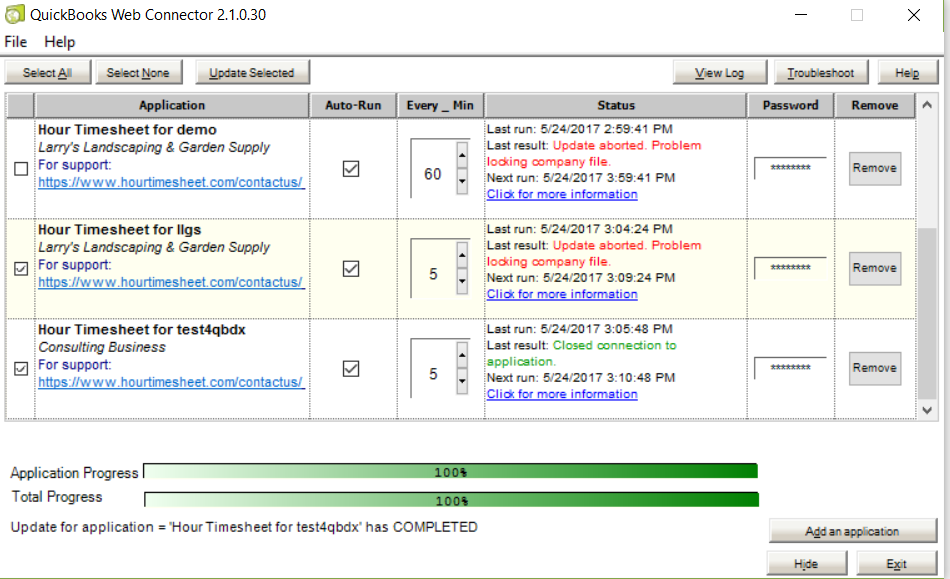
Screen 10 – After successfully adding the application to web connector, click
Update Selected button from the web connector to start the import process connect to QuickBooks. If you have more than one application connected to your company QuickBooks file, you will need to locate the Hour Timesheet application from the list and
place a check in the left-hand check box.
Best Practice – set the check box to
Auto Run and change the value in the
Every_Min to
60. This will automatically sync your QuickBooks company file and your newly created Hour Timesheet site ever 60 minutes.
Final Connection Setup – Upon successful completion, the Hour Timesheet Setup Wizard will change the connection status on the screen to
Connected and the Next button will be active (you can click it).