If your company uses QuickBooks Desktop for accounting and needs a reliable way to track employee time for payroll and job costing, integrating Hour Timesheet with QuickBooks can save you hours of manual data entry every pay period. The QuickBooks Web Connector creates a secure, automated bridge between your timesheet system and your accounting software, ensuring accurate time data flows seamlessly into QuickBooks.
In this guide, we’ll walk you through the complete setup process for connecting Hour Timesheet to QuickBooks Desktop using the Web Connector.
What You’ll Need Before You Start
The setup process is straightforward, but you’ll need a few things ready before you begin:
1. Your Web Connector File
Hour Timesheet Support will provide you with a custom Web Connector file (.qwc extension) that contains your secure connection credentials. This file is unique to your account.
Don’t have your file yet? Simply email support@hourtimesheet.com and provide:
- Your Hour Timesheet account URL
- The email address of the person who will manage the Web Connector (note: this person must already be set up as a user in Hour Timesheet)
2. QuickBooks Administrator Access
You’ll need to be logged into QuickBooks Desktop with Administrator permissions to authorize the connection.
3. Single User Mode
For the initial setup, QuickBooks must be running in Single User Mode. After setup is complete, the Web Connector can run in Multi-User Mode for ongoing syncs.
Special Note for Cloud-Hosted QuickBooks Users: If you’re using Right Networks or another cloud hosting service for QuickBooks, check with your hosting provider first. Right Networks has specific instructions for Web Connector setup that you can find here.
Step-by-Step: Setting Up the QuickBooks Web Connector
Now let’s walk through the setup process. The entire process typically takes about 10 minutes.
Step 1: Save Your Web Connector File
When you receive your .qwc file from Hour Timesheet Support, download it and save it somewhere easy to find—your Desktop or Downloads folder works perfectly.
Step 2: Open QuickBooks as an Administrator
Launch your QuickBooks Desktop company file and make sure you’re logged in with an account that has Administrator privileges. This is essential for authorizing third-party applications.
Step 3: Navigate to Web Services
In QuickBooks, go to File > Update Web Services. This opens the QuickBooks Web Connector interface where you’ll manage all your third-party application connections.
Step 4: Add Hour Timesheet
Click Add an Application, then browse to the location where you saved your .qwc file in Step 1. Select the file and click OK.
Step 5: Authorize the Connection
QuickBooks will display an “Authorize New Web Service” screen. This is QuickBooks asking for your permission to let Hour Timesheet access your company file. Click OK to grant access.
Step 6: Set Certificate Permissions
If QuickBooks shows you an application certificate screen, look for the option that says “Yes, always allow access even if QuickBooks is not running” (this is usually the last option). Selecting this ensures your Web Connector can sync automatically in the background.
Step 7: Confirm Your Administrator Account
From the dropdown menu, select your Admin user account, then click Continue. You should now see “Hour Timesheet” appear in your list of Web Connector applications.
Step 8: Enter Your Hour Timesheet Password
The Web Connector will ask for a password. Enter the same password you use to log into your Hour Timesheet account.
Step 9: Run Your First Sync
Check the box next to Hour Timesheet in the Web Connector window, then click Update Selected. Congratulations! Your first sync is now running.
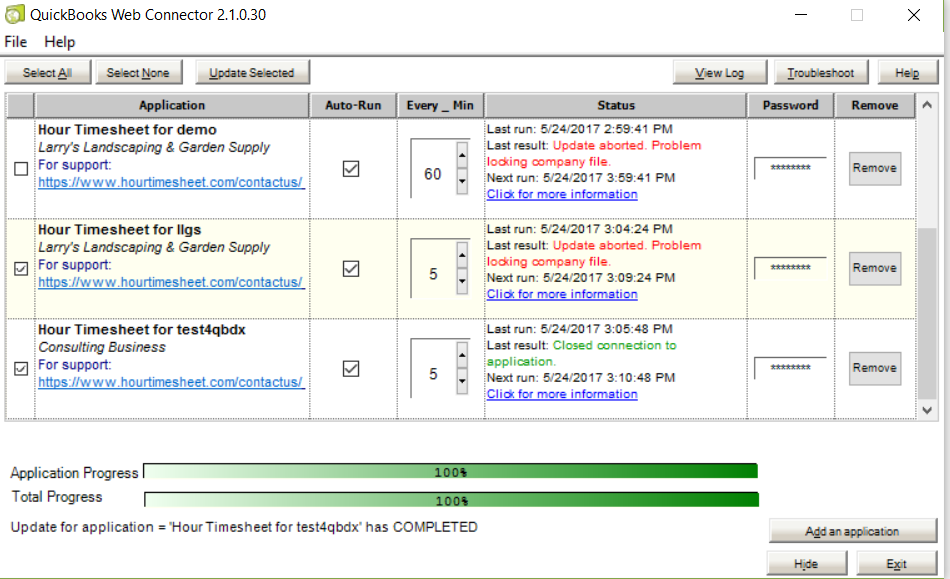
After Setup: How to Use the Web Connector
Once you’ve completed the initial setup, using the Web Connector is simple:
- Open the QuickBooks Web Connector (it’s typically in your system tray or you can access it through the QuickBooks File menu)
- Check the box next to Hour Timesheet
- Click “Update Selected”
The Web Connector will sync your timesheet data based on your configured settings. Many customers set the Web Connector to run automatically at scheduled intervals throughout the day.
Important Considerations for Multi-Company Environments
If your business operates multiple companies or has multiple Hour Timesheet accounts, keep this in mind: each QuickBooks company file requires its own Web Connector file. The Web Connector can only communicate with one company file per computer.
This means if you have three separate companies, you’ll need:
- Three separate Web Connector files
- Three separate Hour Timesheet accounts
- The Web Connector configured on the computer(s) that access each respective QuickBooks company file
Troubleshooting Common Issues
Web Connector won’t sync?
- Make sure you’re using the correct Hour Timesheet password
- Verify that QuickBooks is open and the correct company file is loaded
- Check that the Admin user who authorized the connection is the same one logged in
Can’t find the Update Web Services menu?
- Make sure you’re using QuickBooks Desktop (not QuickBooks Online)
- Verify you’re logged in as an Administrator
Getting permission errors?
- QuickBooks may need to be in Single User Mode
- Try closing and reopening both QuickBooks and the Web Connector
Start your free trial today or contact our support team at support@hourtimesheet.com if you have any questions about the setup process.